This article was prepared with AI assistance based on an analysis of the current Lumina Studio source code, existing Wiki content, and relevant workflows. It has been checked against the current version, but omissions or details that become outdated may remain as the software evolves. If you find an error or have a clearer explanation, example, or suggestion, please leave a comment on this page or propose an edit on GitHub.
Classic LUT
A Classic LUT is a precomputed colour lookup table. Each printable colour is paired with a fixed layer-by-layer material recipe, and Lumina Studio selects the closest table entry while previewing an image.
Select LUTs
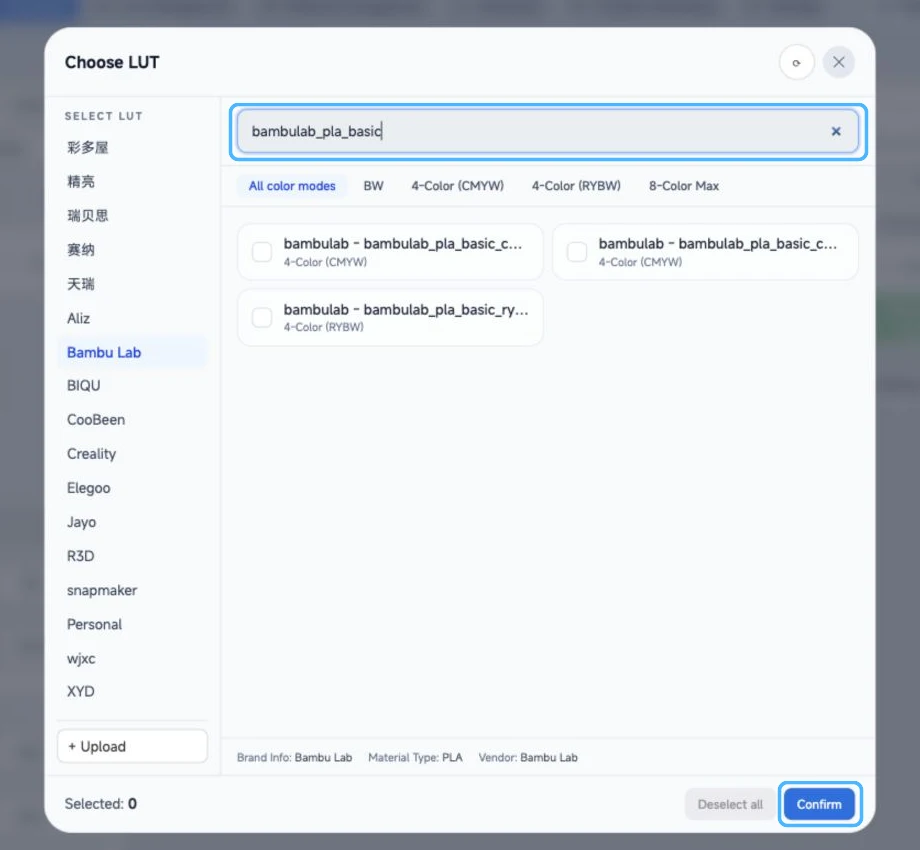
- Select Classic LUT under Color Data Source and open the LUT selection window.
- Search or browse the list and select your LUTs. You can select LUTs from different brands.
- Confirm the selection, generate a preview, and inspect key colours, greys, and shadows.
Compatible LUTs can be selected together. The first selected item remains the primary LUT and the selected tables form one candidate set; no merged file is written to disk. Do not combine tables with incompatible layer counts, layer heights, or material channels.
Refresh and upload
The refresh button inside the selection window reloads the LUT list without modifying LUT files.
Upload accepts .npy, .json, .npz, and .msgpack. After uploading, confirm which LUT is actually selected. A readable
file can still contain incomplete colour-mode, layer, or recipe metadata, so inspect LUT Details if the preview is unexpected.
Dynamic layers
Colour Layers and Layer Height only appear when LUT metadata declares supports_dynamic_layer_count. The store limits the
layer count to 1–20 and the layer height to 0.04–0.20 mm, then invalidates old outputs.
Ordinary legacy LUTs continue to use their stored layer count and height when these controls are not shown.
Submit feedback
Your feedback is sent privately to the Wiki maintainers and is not displayed publicly on this page.